Showing posts with label Beauty. Show all posts

Wednesday, October 14, 2015

Drugstore Cosmetic Favorites!

Hey Guys! Today I wanted to share with you some of my makeup go-to's from the drugstore. I would say I use a pretty good combination of both drugstore and high end cosmetics. For my eyeshadows I typically gravitate towards MAC cosmetics just because I know the quality and pigment is always on point. I am also in love with Make Up Forever's powders!

But let's get back to the cheap inexpensive portion of the program..


Revlon 24Hr Color Stay Foundation 


First things first. You need a good foundation. If you like full coverage (without looking cakey) but want your makeup to last, this is awesome. I have pretty oily skin so the combination/oily version works wonders for me and it seems to really stay in place (I don't know about the whole ''24 hr" thing, but you shouldn't be wearing your makeup that long anyway!) I find once I set this with a good powder, I don't really need any touch-ups throughout the day. I have even talked to makeup artists who swear by this drugstore gem:)

*Under $10 at Walmart


e.l.f Studio Eyebrow Kit
If you don't color in your brows, you probably should be. Nothing compliments your face more then  beautifully sculpted brows. This kit is actually a great dupe for Smashbox's brow kit but is only $3.00!! On the left you have the wax to shape your brows, and on the right you use the powder to fill in your brows. (Don't go overboard!) You can either use the tiny brush it comes with, or you purchase a separate angled brow brush for easy application

*$3.00 at Target


N.Y.C Liquid Eyeliner


For the longest time I was using Mac's felt tip liquid liner, but it was a challenge to get a perfectly thin line. I bought this NYC eyeliner on a whim (since it was cheap) and O.M.G. this is the EASIEST liner to apply ever!! With one quick swoop you achieve the perfect thin wing. Just trust me and try it. 

Under $5 at Walmart


N.Y.C. Mosaic Face Power Color Wheel

Another one of my N.Y.C. favs is the Mosaic Color Wheel. I use this for a natural glow without looking like a carrot. I'm not sure if this is supposed to act as a bronzer, but that is what I like to use it for. My favorite thing about this powder is that it's matte and has absolutely NO SHIMMER. As previously mentioned, I am pretty oily, so I try to avoid anything with any type of shimmer (which is a challenge in itself) I used to use Bare Mineral's Warmth powder, but if over-applied, you run the risk of looking dirty. (gross) 

Under $5 at Walmart 


L'Oreal's Volumious False Fiber Lashes in Black Lacquer
Maybelline Falsies Macara in Black Drama


For mascara it's pretty much a toss-up between these two. I love L'Oreal's product for extra length, but I also enjoy how thick Maybelline's mascara make my eyelashes appear. One thing I don't like is that the L'Oreal does seem to dry up quicker :( 

*Both Under $10 at Ulta Beauty


Rimmel London Exaggerate Lip Liner in Eastend Snob


For the perfectly pink lips, this is my everyday go-to. I just think this shade is the right nude for every skin tone and is great for that over exaggerated Kylie Jenner look. Wear it beneath a sheer gloss or let it stand alone. 

*Under 6 at Target

Try not to get caught up in all that hype about having the best of the best. Yes, it is a good idea to invest in some higher end products, especially for a special event or occasion. But you can still be beautiful, even on a budget ;)


Stay classy!
Xx,
                                           

Thursday, September 4, 2014

No More Chipped Nails!!

I have been super excited to write this particular blog post because I am absolutely OBSESSED and impressed (I know, I say this about everything) with Sally Hansen's Gel Polish Manucure Kit! Sally is my girl and she has got it right with this kit. 

Okay, before I get too excited, it is a bit on the pricey side. I know that may scare you away but if you're like me and you hate..no..LOATHE chipped nails, this is a kit for you! I love to paint my nails. I find it quite therapeutic and relaxing actually, but when I see a chip, especially if it's the next day or two, I get annoyed, antsy, and just re-do them. 

Because of this, I recently started getting gel manicures. You see, I cocktail waitress at a pretty upscale restaurant and how tacky would it be if I was serving this expensive food and drinks with my ratchet nails. Not cute and not very appetizing. Also, when your nails are on-point, it makes you feel pretty too. 

So these gel manicures were costing me about $35.00 every two to three weeks. (They were only lasting about a week anyway..) As I would watch the woman do my nails, I thought, "I could totally do this." So I did some research, read some reviews, and came across Sally's at-home gel kit. NOT THE STRIPS( I haven't tried those.) I buckled down and spent the $69.99 on a kit at Walgreens, only to see it on sale at Target for $45.00 like a week later. (Totally annoying..I know.) And came home and followed the easy step-by-step instructions.

So, it didn't look as great as Wone (my nail lady) does it, but of course, everything takes a little practice. I couldn't believe how long they lasted and how nice my nails looked. Not to mention, everyone thought I had got them done which was worth the cost to me right there. Although I spent 70 bucks on it, I have already done my nails about 6 times which would have cost me over $200! 

The only problem is with this "starter kit" it only comes with one color. So basically you're stuck with that color until you pay another $10.00 to buy another color you fancy. (Which is STILL cheaper than 35 bucks!)

When you buy the kit, this is what it comes with..


1. Base coat
2. Nail color
3. Top coat
4. 10 cleaner pads
5. Cuticle stick, nail file/buffer
6. Acetone remover
7. LED lamp.

It also comes with instructions. Now, I would walk you through step-by-step of how to complete the process but I'm pretty sure if you're reading this blog, you can read instructions, so I won't bore you ;)

Basically, you do base coat, lamp.
Nail color, lamp.
Top coat, lamp.

Just make sure you do THIN layers of each coat, otherwise the polish will be too thick and will peel off and won't last as long as you would like.

**SECRET TIP** the kit only comes with 10 cleaning pads, but I discovered that it's essentially just rubbing alcohol, so if you have some around the house, you can use that with a paper towel. (or something lint free) 

Removing the gels can be a bit of a pain. It says to apply the acetone to a cotton ball and wrap the cotton and piece of foil around your nails and let it soak until the color melts off. I don't do this and I actually just peel it off, which is probably bad for your nails, but I'm guessing soaking them in acetone isn't the best either :/


I didn't do such a great job the first time, but here is my nails after 8 days!! I kid-you-not! No chips yet!  This is my favorite color also, it's called "Pat on the Black"

I hope you get a chance to try this amazing kit!


Stay classy!
Xx,

Sunday, August 24, 2014

How to Get the Perfect Winged Liner

Oh my goodness, I have been SLACKING in the blogging department. Sorry! Anyway, I have recently been asked by a few people to post a blog about how to achieve the perfect winged liner. I came across this great diagram (better than anything I could ever make) and it's a perfect demonstration of the easiest way to get this look. 


     http://rockettqueen.tumblr.com/post/54267437587/winged-eyeliner-pictorial-steps

When doing your liner it's always important to start from the outside and work your way in toward the eye. (towards your nose) 
1. First make a very small line angled toward the end of your eyebrow.
2. Next connect that line to the outer corner of your eye.
3. After that you can connect that line to the inner corner of your eye and setting desired "thickness"

** the bigger the eyes you have the thicker the line you can can have. However, if you have smaller eyes, then you may wanna make your liner much thinner so it doesn't over power the shape of you eye. I have very small eyes, so sometimes I like to draw my liner in, only to about the  middle of my eye and not drag it all the way in towards the corner of my eye. I think it make my eyes open up more.

Here's an example of how I do my liner.


You can achieve this look using any type of liquid or gel liner that you prefer. I personally use Mac's liquid liner in"boot black" which is a felt-tip liner that lasts FOR-EV-ER! (seriously, like almost a year) 


Some may find it easier to use gel liner and for this I would recommend Maybelline's "Eye Studio." With gel liner the key is to make sure you have a very small angled brush


I believe this liner comes with a brush but if you don't like it then here are some other examples of what you should look for. 


Most importantly.. PRACTICE, PRACTICE , PRACTICE! No one ever gets it right the first time. I, myself struggle to get it perfect but the more and more you play with it, the more it will become effortless. 


Cheers, dolls!
Xx,

Thursday, July 10, 2014

How To Clean Your Makeup Brushes With Household Items

They're something we use almost every single day and probably the most neglected..OUR MAKEUP BRUSHES!

I admit it. I, myself, have a tendency to forget to wash my makeup brushes from time to time. Which, if you think about it, is kinda nasty because of how easily they can collect bacteria and then we rub them on our clean faces and near our eyes. This can cause breakouts or even eye infections.

I'm trying to get in the habit of washing my brushes once every two weeks, or at least once a month. Plus, every time you give them a good deep cleaning, it's as if you have a whole new set of brushes! I used to just wash my brushes with some of my regular face wash, then I tried using actual brush cleaner (Bare Minerals) but even after I did that, it still seemed as if there was makeup residue that just didn't wanna budge.

Then one day, while on set of a commercial, a makeup artist gave me a super helpful tip to try using olive oil. So I went home and tried this concoction that I'm sure some of you may have already heard of, but if not, get ready for the magic!

Things you will need:
1. Olive Oil (Extra Virgin Olive Oil will work too)
2. Dish Soap
3. Face Wash
4. Mixing Bowl or Plate
5. Dry Paper Towel


Step 1:
In a small mixing bowl add one capful of Olive Oil, 2 pumps of dish soap and I added one pump of my face wash, just for more anti-bacterial fighting power!


Step 2: 
Mix dirty brush in cleaning solution and then rub the brush back and forth on the palm of your hand. Continue to scrub and rinse clean under sink until the water runs clear. Be sure to be extra gentle when scrubbing goat hair brushes, as the hairs could fall out.


Step 3:
Rinse under HOT water to kill any left over bacteria and to melt any makeup buildup left behind.


Step 4:
Reshape damp brushes with finger tips and lay on a paper towel to dry. (preferably overnight)

Here's an example of just how effective this technique is. This is my FAVORITE foundation brush from Sigma that I can never seem to get clean, until now! 


This picture may not do justice, but the bristles on the right are white again, like the day I bought the brush.

This is a great way of maintaining your brushes, especially for those who invest in expensive ones. The olive oil keeps your brushes conditioned and soft, while the soap fights any bacteria and keeps them nice and clean :)

Cheers, dolls!
Xx,

Wednesday, June 18, 2014

5 Beauty Essentials You Won't Regret Buying

Since I created this blog, I have been wracking my brain with all the beauty products I use and which one I should write about first. So after much consideration, (and a little help from my roommate, Sara, 'hey, girl!') I decided to just narrow it down to five. Well... At least for now. These may change in a month from now, or a week, or hey let's face it, I'm a girl, and I can change my mind by the time I finish this post.

Now, let's get to it!


PHILOSOPHY: Purity Made Simple One-Step Facial Cleanser
My sister was actually the one that got me turned on to Philosophy products and although I have only been using this cleanser for a couple of months, my my, I am IMPRESSED!
                     
 Reasons I love this product:
  1. Ever wash your face and even through you scrubbed and scrubbed your little eye balls, you still look like a hot mess that had a rough night? Well this products says it "deep cleans pores and eliminates makeup build-up," and it truly does. 
  2. It leaves your face with a nice healthy glow and feeling balanced. I have never had the greatest skin, and even to this day, I experience break-outs, especially around the ever-so-lovely time of the month. But since I have started using this, I kid you not, my skin has been clearer than ever!! *knock on wood* 
  3. It smells good and a little goes a long way. Even though this product is more then what you may be used to spending on facial cleansers, I find that it does last a long time. (Which I LOVE!) 
  4. It comes in different sizes. It comes in 8 fl. oz., 16 fl. oz., and even this adorable 3 fl. oz. which is great for traveling, or I would even recommend buying that first and testing it out before you commit to a larger bottle. 


   it's a 10 Miracle Leave-In Product
I started using this product because I began swimming at the gym and noticed my hair was getting super dry and brittle from the chlorine. (I know I know, "use a swim cap!") But I bought this in attempt to try to repair my hair from all the damage and it has definitely helped!

Reasons I love this product:
  1. It smells so good, like you just left Tina at the salon and dropped 150 bucks on a shampoo and deep condition. 
  2. Super simple to use. You do 3 or 4 sprays in your hands and rub it through your damp hair after you get out of the shower. It also works as a detangleR. <- not a word.  
  3. It promises to do 10 THINGS INSTANTLY.. ( I won't list all 10) but it most importantly protects your hair from thermal heat. 
  4. It leaves your hair feeling super silky and shiny but not greasy. (Remember, only 3 or 4 sprays)
  5. And in my personal opinion, I find it acts as a great styling product and if I use it before I curl my hair it seems to help the curls last longer. 


Dr. George's Dental White


             ...because who doesn't want white teeth. 

Reasons I love this product:
  1. Makes your teeth SO white.. like almost, unnatural white, which I'm kinda obsessed with.
  2. It doesn't make your teeth sensitive ( or at least not mine.) I have tried using whitening strips many times and they hurt my teeth so bad. This is the first thing I have ever tried that didn't make my teeth super sensitive.
  3. It only takes 30 minutes and I would use this a couple times a week when I got it, then when my teeth were as white as I thought they should be, I just use it to maintain. I'll just pop it in when I am watching an episode of my favorite Real Housewives or cleaning my room:) 

BE AWARE: This isn't sold in stores and I found mine on Amazon. It isn't very expensive, but it is shipped from the UK, so be patient, as it may take a couple weeks to arrive. But I assure you, it's worth the wait! 


Jergens Natural Glow Daily Moisturizer

Anyone who knows me well, knows I am OBSESSED with this product. I'm sure all my closest girlfriends are reading this thinking "yep, I knew she would mention this one." I love being tan. Not gross, Jersey-shore-kinda-tan, but nice a olive tone, especially in the summer. 

Reasons I love this product:
  1. It doesn't turn you into an oompa loompa. This is supposed to be used as daily moisturizer with just enough color that will help you build a gradual tan. It doesn't streak like your typical self-tanner, but it does have a scent to it, which some may not like. (I don't mind it)
  2. It claims to be a "firming" lotion. I don't know about all that, but it does make you appear tan, which in essence makes you appear more toned. Duh.
  3. I recommend this for those who want just a nice glow and not someone who loves to look like a carrot. Speaking of carrots, If you are really fair, I think it's a good idea if you sit in the sun for a bit, just to get a nice base coat and then apply this just to maintain your lusciousness. Otherwise, applying this directly on fair skin may result in looking a little orange. (I always get a base first) 
  4. You get a great subtle tan without baking in the sun and damaging your beautiful, healthy skin! 
My mom and several of my friends are hooked on this and if you can get passed the scent, I'm sure you will be too! (If not, oh well, I still like it.) 


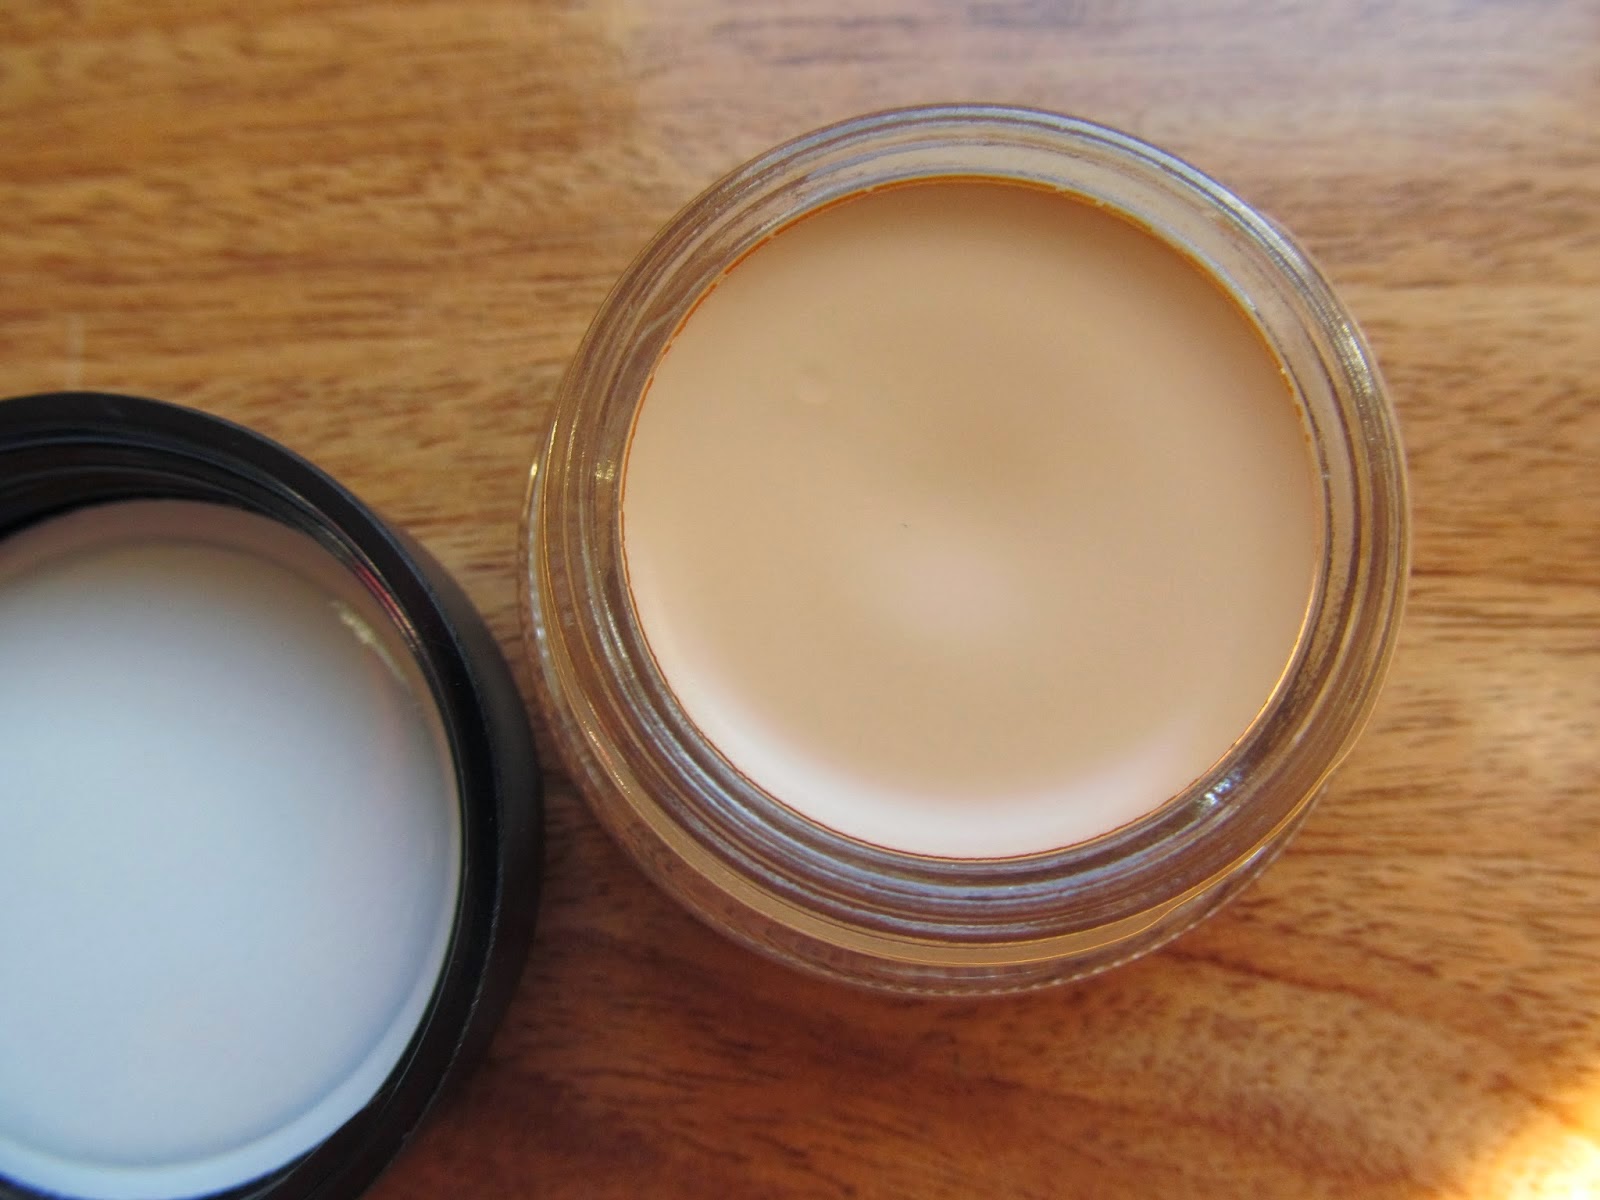
MAC Pro Longwear Paint Pot- Eye Primer


Ever put on your favorite eye shadow and half way through the day, you think you're still looking fab, until you look in bathroom mirror and your shadow has become this disgusting creasy mess?? That's not cute. 
 SOLUTION- EYE PRIMER! For those of you who already prime your eyes before applying your shadow--high five! For those who don't--it's ok, I wasn't aware a few years back either.
Priming your eyes before you shadow is a must! And this is my ALL TIME favorite makeup product EVER!! (Well, thus far..)

Reasons I love this product:
  1. Keeps your shadow in place, all day. Seriously.
  2. Makes the color of the shadow you're applying more vibrant. (which I finds helps me use less shadow)
  3. It also acts a concealer. Especially if you have veiny eye lids. Sometimes I just apply this on my lids and a little mascara and that's it. 
  4. IT LASTS FOR-EV-VER!! A pod can last up to a whole year. So even though it's kinda pricey, it's worth it. 
** They make these in different colors to be used as really pigmented shadows but I use the color "Soft Ochre" as my primer. 


Hope you get a chance to try at least one of these products!

xo,
 c